Diagonal struts

Man, this is tedious. At first they looked like simple 1x1mm struts, easy to attach. However each of them is a bit different. And putting this into a building instruction is a nightmare.

I will probably just cut the stock itself to be cut to fit.

Next (well honestly the first) problem I ran into are the two lengthwise bracing walls. These were obviously added afterwards. See next post.

checking_alignment

Heavy metal

Thinking about making the fittings, hinges, rolls and everything made me look for sources of allready available parts.

I came across a supplier for large garden railways:

http://www.knupfer-grossbahn.de/

The offer a wide variety of norm parts, especially very small screws. Finding these I decided to use real screws instead of fake ones. I also found appropriate rolls that can be used for the control lines. Some parts may be used for making hinges and connectors. The even have steel wire starting at 0.3mm. Mmmhhh, am I going to make functional controls. Yes it is a bit overdone….on the other hand worth a try 🙂

Aileron support spar

I recently added the aileron spar without having any trouble. Although the drawings are almost 100 years old and do not contain any tolerances the parts simply slip into place. We will see if this will change.

Next step will be the wing tip…

Rigging the wing

As I said before, the one rib is used multiple times. This gives me the opportunity to get a pretty impressive wing using three parts:

  • Rear Spar
  • Front Spar
  • Ribs

The front spar was almost the same as the rear spar. It is only a bit different in shape at the tip area due to the washout of the wing.

Click the below image for a better view. Here I allready included the shortened ribs of the aileron part of the wing. Like I mentioned they are the same as the main rib simply cut down.

Wing with two spars

Another from from the tip side:

Short ribs in place

First rib in place

Having defined a reference line using the rpevious mentioned fittings I was able to position the first rib. This root rib is completely closed with spruce on the outside. I will reproduce this using coloured cardboard. I would like to be able to cut all the parts directly without printing anything beforehand.

A nice home for the ribs

Having finished the main rib, I needed a nice place to put it. The Sg-38 has two main spars and I decided to start with the rear one. Why? Well, this one has less fittings to deal with.

The spars are pretty simple constructions. They are basically a large plate of 1,5mm spruce backed on both sides with enforcements of 8x4mm pine strips. Doing this in card is pretty challenging. The main spar is a piece of card 0,2mm thick ánd 600mm long. The reinforcement strips which take the stress and strain loads of the wing will be lasercut. I might need to make this in several pieces depending on the paper format. However this is the design phase and I will simply design them as is and think about parts arrangement later.

Spar 1

Creating some ribs

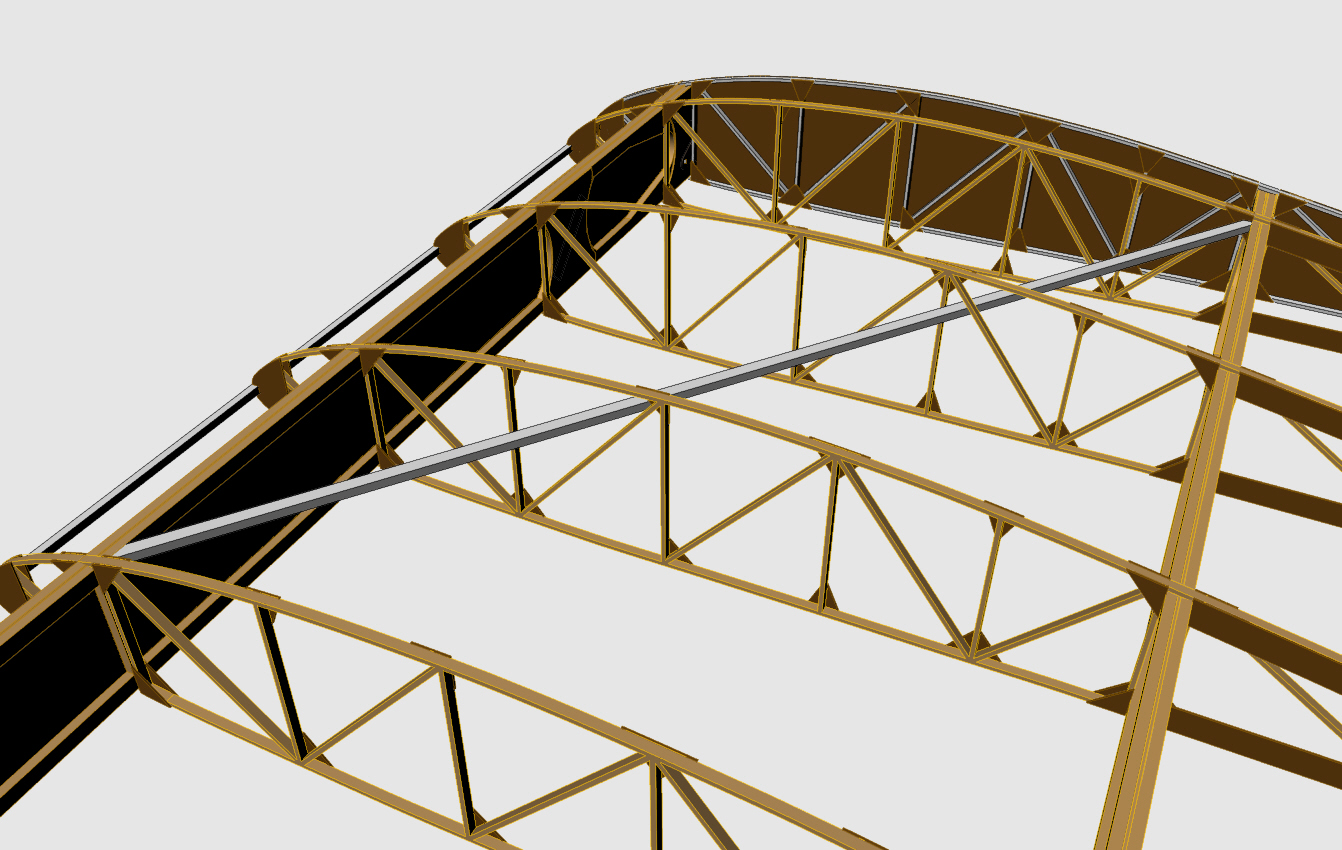
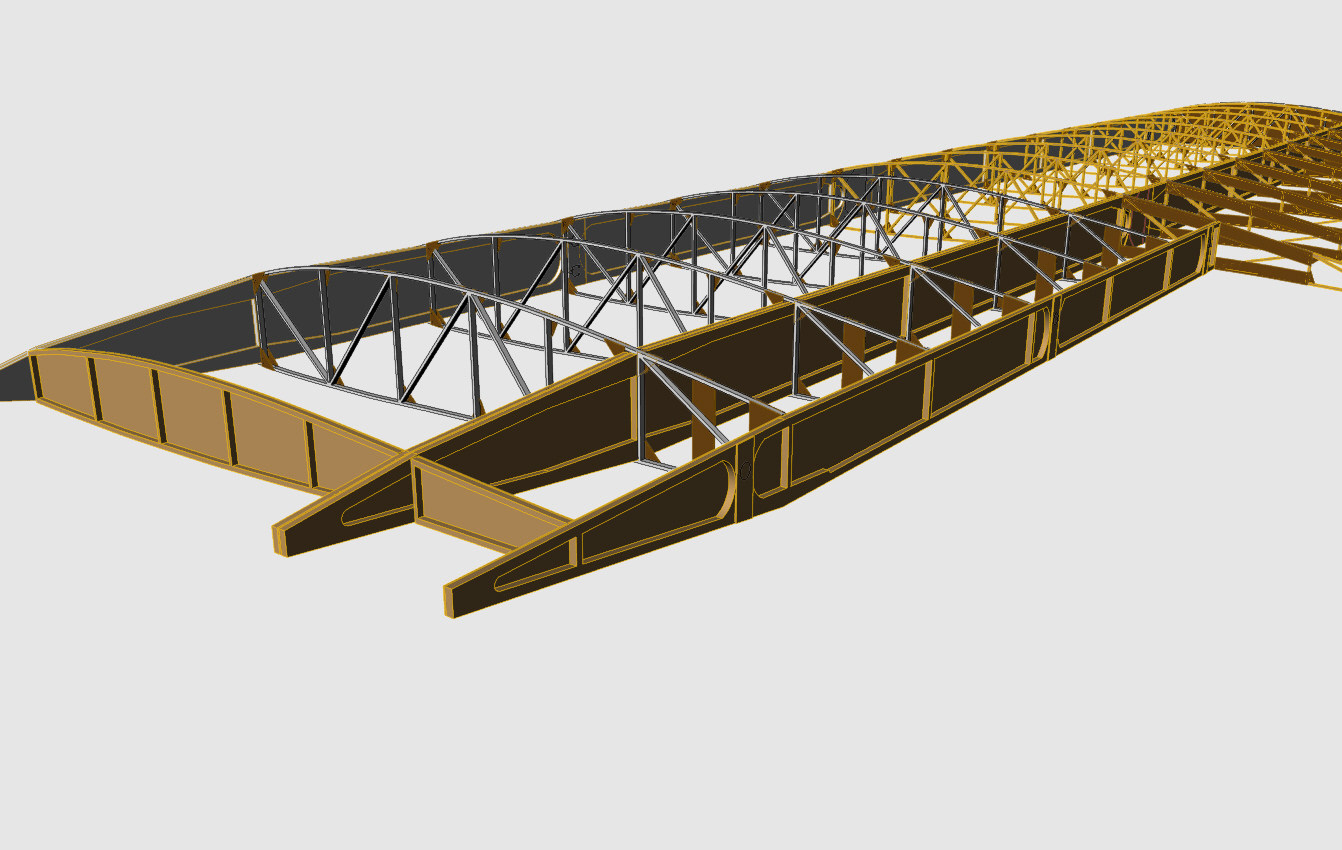
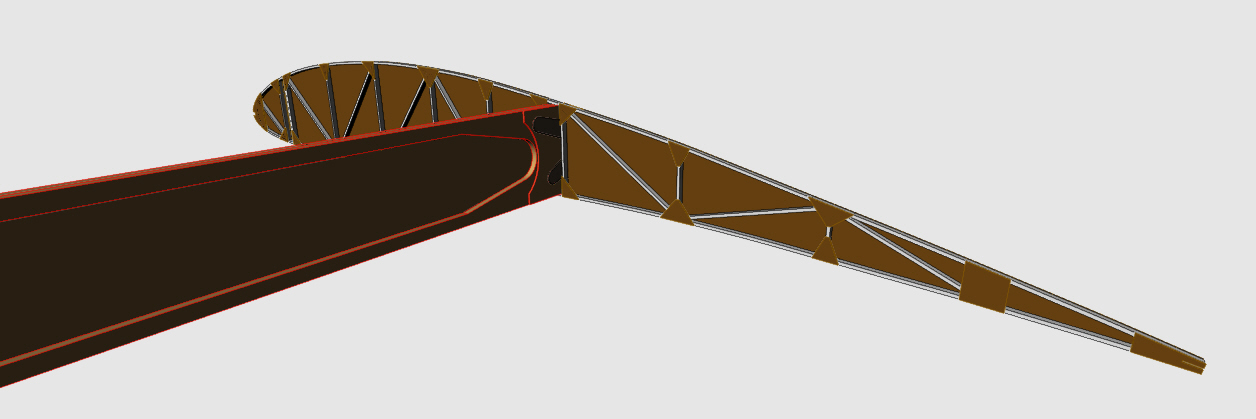
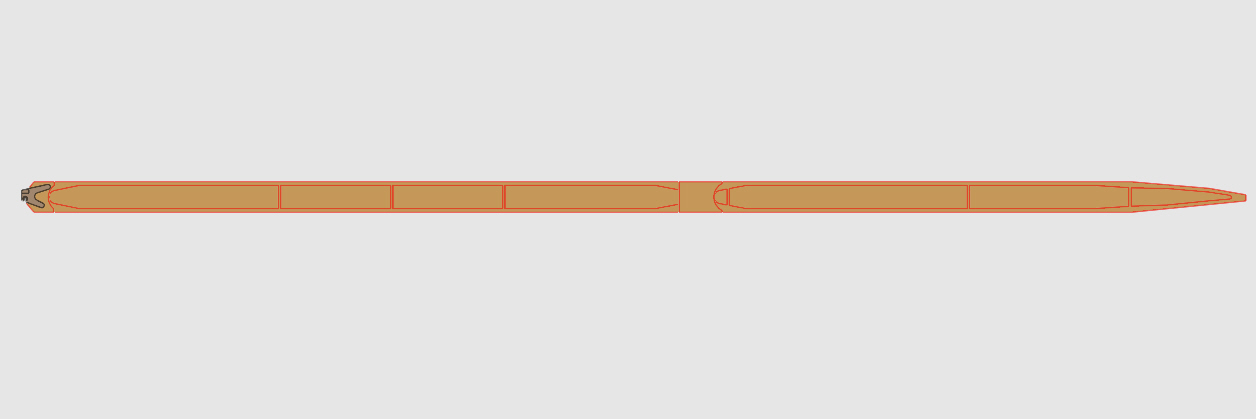
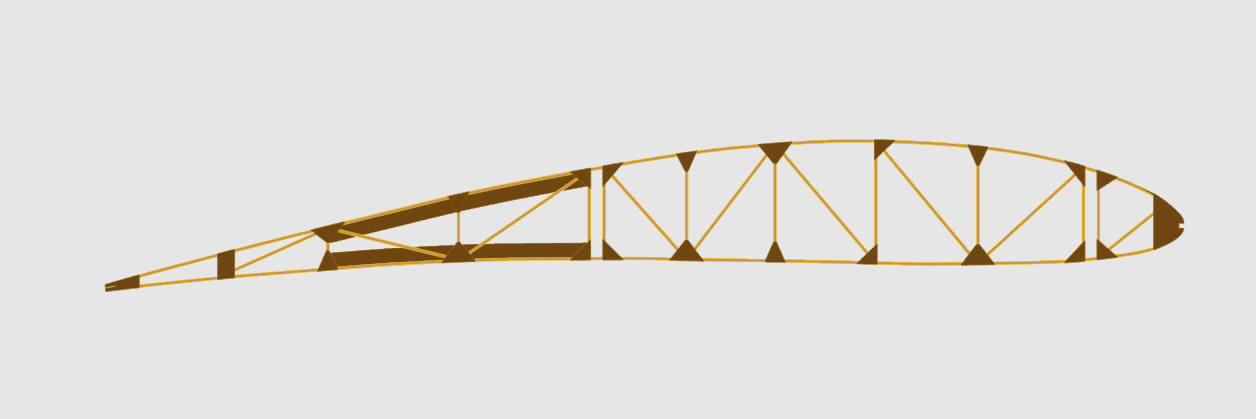
The first part to be designed is the rib. I’m saying „the rib“ because there is just one. This one design is used in different configurations throughout the whole wing. So starting here has a few benefits. The part is pretty straight forward. It will be cut from a single piece of 1mm cardboard. The corner and edge enforcements are 1,5mm spruce on the original. These will be cut from regular 160gr/m² paper/card.

Thinking of cutting: Maybe it is not needed to have the corner enforcement and all the other parts in this thickness cut by laser. I might design it to be cut by hand with a clever layout for cutting efficiency. Or I might acquire a cutting plotter like the a Silhouette Cameo by Graphtec. This is a small desktop cutter which should be suitable for a smaller project.

I am also thinking about a layout which makes it quick and easy to position all the parts in one step. Like glueing the rip structure to the enforcment parts which are still in the paper frame and cutting everything afterwards (I think I might need an image to explain that). This would save me from having to number all the parts indiviually.